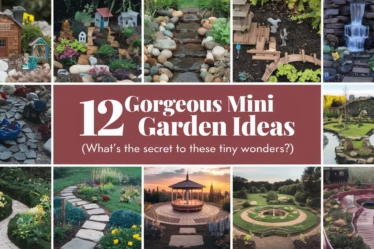
This Blog post is about How to Layout an Herb Garden
Hey there, future herb garden guru! Are you dreaming of stepping outside to snip fresh basil for your pasta or pluck mint for your mojitos? Growing your own herb garden is not only easy but also incredibly rewarding. Whether you have a sprawling backyard or just a tiny balcony, this beginner’s guide will walk you through how to layout an herb garden that’s both functional and fabulous. Let’s get growing!
Why Grow an Herb Garden?
Before we dive into the nitty-gritty, let’s talk about why herb gardens are the BEST:
- Fresh flavors at your fingertips: Say goodbye to wilted store-bought herbs.
- Cost-effective: Save money by growing your own.
- Aromatherapy: Herbs like lavender and rosemary smell amazing.
- Beginner-friendly: Most herbs are low-maintenance and forgiving.
Ready? Let’s dig in!
Step 1: Choose Your Spot
Picture this: A sunny corner of your yard, a windowsill, or even a balcony bursting with greenery.
- Sunlight: Most herbs need 6-8 hours of sunlight daily. Pick a spot that gets plenty of sun.
- Drainage: Herbs hate soggy roots, so ensure your spot has good drainage.
- Accessibility: Place your garden near your kitchen for easy harvesting.
Hack: If you’re short on space, use containers or vertical planters!
Step 2: Decide on the Layout
Picture this: A neatly organized herb garden with pathways, raised beds, or cute pots.
Here are a few layout ideas:
1. The Classic Kitchen Garden
- Plant herbs in rows or clusters near your kitchen door.
- Use raised beds or in-ground planting.
2. The Container Garden
- Perfect for small spaces! Use pots, window boxes, or hanging planters.
- Group herbs with similar needs together (e.g., Mediterranean herbs like rosemary and thyme).
3. The Spiral Herb Garden
- Build a spiral-shaped raised bed for a stunning focal point.
- Plant sun-loving herbs at the top and moisture-loving herbs at the bottom.
4. The Vertical Herb Garden
- Use wall-mounted planters, pallets, or trellises.
- Great for balconies or small patios.
Step 3: Pick Your Herbs
Picture this: A mix of fragrant, flavorful herbs that suit your cooking style.
Here’s a beginner-friendly herb list:
- Basil: Perfect for pasta and pesto.
- Mint: Great for drinks and desserts (but plant it in a pot—it spreads like crazy!).
- Rosemary: A hardy herb for roasting and grilling.
- Thyme: Versatile and low-maintenance.
- Parsley: A must-have for garnishes and salads.
- Cilantro: Essential for salsa and Asian dishes.
- Chives: Delicate onion flavor for eggs and potatoes.
- Lavender: For aromatherapy and baking.
Hack: Start with 3-5 herbs you use most often. You can always expand later!
Step 4: Prepare the Soil
Picture this: Loose, nutrient-rich soil that your herbs will love.
- Use well-draining soil mixed with compost for nutrients.
- If planting in containers, use a high-quality potting mix.
- Test your soil’s pH—most herbs prefer slightly acidic to neutral soil (6.0-7.0).
Hack: Add a layer of mulch to retain moisture and keep weeds at bay.
Step 5: Plant Your Herbs
Picture this: A beautifully arranged herb garden with plenty of room for growth.
- Spacing: Give each herb enough space to grow. Check the seed packet or plant tag for guidance.
- Grouping: Plant herbs with similar needs together (e.g., Mediterranean herbs like rosemary and oregano prefer drier soil).
- Depth: Plant at the same depth as the nursery pot.
Hack: Label your herbs with cute markers so you don’t forget what’s what!
Step 6: Water and Care for Your Herbs
Picture this: Happy, thriving herbs that make your backyard smell like a spa.
- Watering: Most herbs prefer slightly dry soil. Water when the top inch of soil feels dry.
- Pruning: Regularly trim your herbs to encourage bushy growth.
- Fertilizing: Use a light, organic fertilizer every 4-6 weeks.
Hack: Overwatering is the #1 killer of herbs. When in doubt, underwater!
Step 7: Harvest and Enjoy!
Picture this: Fresh herbs garnishing your meals and impressing your friends.
- Harvesting: Snip leaves in the morning when flavors are strongest.
- Preserving: Dry or freeze excess herbs for later use.
- Using: Experiment with new recipes and herb combinations.
Hack: Don’t harvest more than 1/3 of the plant at once to keep it healthy.
Bonus Tips for Herb Garden Success
- Companion Planting: Grow herbs near veggies to deter pests (e.g., basil with tomatoes).
- Rotate Plants: Change up your layout each year to prevent soil depletion.
- Go Organic: Avoid chemicals to keep your herbs safe for cooking.
- Add Decor: Use garden gnomes, fairy lights, or colorful pots to personalize your space.
Want Garden Inspiration?
You’ve got a great start with these 10 easy garden layouts, but why stop here? Whether you’re dreaming of a cottage-style retreat, a modern minimalist space, or a lush edible garden, there’s more to explore!
Check out 15 Easy Garden Layouts for a Stunning Backyard for even more gorgeous ideas to transform your outdoor space!
Final Thoughts 🌟
Creating an herb garden is one of the easiest and most rewarding gardening projects you can tackle. Whether you’re a seasoned gardener or a total newbie, these steps will help you grow a lush, fragrant herb garden that’s as practical as it is pretty.
So, what are you waiting for? Grab your trowel, pick your favorite herbs, and start planting your own little slice of paradise.
Pin this guide for later and share your herb garden journey with us! 📌✨


